Friday, July 31, 2009

MindMap Navigator 1.3 is Released

FYI

I want to inform you that MindMap Navigator 1.3 is released. With new functionality it becomes more powerful and easier to use. Below is the list of features being added in the new version:

- Mapview context menu item "Sync with Navigator" allows to position the currently selected MindManager topic in Navigator tree;
- Enhanced "show branch alone" option: now you can set the level of details for the filter - 1,2 or expand all levels;
- MindMap Navigator now works with Mindjet Connect maps;
- State of options on the toolbar is saved when MindManager closes ;
- Ability to Cut/Copy/Paste and Delete multiple topics in the Navigator tree.
Also, several errors were fixed.

You can download your trial copy with a following link: http://www.mind2chart.com/Downloads/Trial/MMNavigator13_en.zip

This upgrade is free for existing users.

Tuesday, July 28, 2009

Embedding your WebBrain in Your Blog


I recently posted about how you can post your PersonalBrain 5 to the web with WebBrain with a click of the mouse. Well pretty close to it. One of the really exciting features of the WebBrain is being able to have access to your links and attachments as if you were working with the PersonalBrain 5 on your desktop. Think of all the possibilities! This is a very powerful feature and one that I will certainly use when I am planning my workshops. Think about giving your attendees a simple URL to your WebBrian that they can access that would allow them to jump to web sites and have access to your attached handouts. That is really an outstanding feature.

WebBrain is evolving as we speak and I just learned that you can now embed your WebBrain in a blog or website by simply clicking on the Share button and copying the embedding code from the Webbrain site. If you click on the Customize option you can change the dimensions to suit your need. I should mention that you can also upload your PersonalBrain 5 files and keep them private so that only you can access them over the web. Likewise you can determine which Thoughts to keep private so that they don't appear when you upload them to WebBrain by marking them as Private thoughts in the PersonalBrain 5. If you have any questions or ideas on how you would use WebBrain - please leave me some comments.

Monday, July 27, 2009

The 19th Carnival of Computer Help and Advice

Welcome to the eighteenth monthly Carnival of Computer Help and Advice - a digest of recent blog articles offering advice on safer and easier computing.

We start this month with a couple of articles about Microsoft Office applications. Excel Matic author Mohit Khurana presents a tutorial explaining How to calculate subtotals using Array functions; and, MrGroove shows How To Delay or Schedule Delivery of Email Using Outlook at groovyPost.com.

For those of you considering purchasing a new computer, Michel of Computer spot/Tech zone offers the first part of a series of articles offering advice about How to buy a computer without getting ripped off. Meanwhile, MikeM presents a Netbook Computer Primer posted at HTS Tech Tips - Computer Tech Tips for Non-Geeks.

Microsoft recently launched their new search engine called Bing. To help users get the most of the innovative features offered by this new search engine, Margaret Garcia published 50 Tips & Tricks for Researching with Bing at Becoming a Computer Technician.

We finish with some practical advice from Mick Hart for anyone wanting to improve their digital photographic portraits. See his tutorial Adobe Photoshop CS4 Tutorials - Creating Awesome Eyes posted at Photoshop Revealed by David Peters.

Many thanks to all those who contributed articles for the carnival.

If you have posted an article offering computer advice that you want to submit to the carnival then use the form over at our Blog Carnival page to submit it for consideration. If you would like to host a future carnival then please leave a comment on this post or on the carnival page. If you don't wish to have the responsibility for selecting articles or writing the carnival post, don't worry I can do that for you.

Sunday, July 26, 2009

My PLN helped me with Google Earth issue


Once again the power of my PLN was evident tonight as I struggled to get something to work in Google Earth, Mac version. Many thank to @tiutmcclain for giving me the suggestion that lead to the ultimate answer. But first, an explanation of the problem.

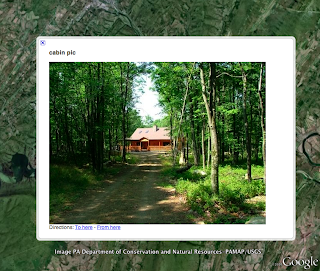
In Google Earth, it's possible to add a picture, or youtube video, or embeddable things, into a placemark using some basic html code. Well, basic for some things, but of course the code for the embeddable things is left up to the site. But here's the important thing to remember. When you Save the placemark into a .kmz file it saves the image, as well. The Z in kmZ stands for Zipped. So the image is zipped into the placemark. This means that you can send that saved file to someone and they will be able to open it in Google Earth and see the image. That's a biggie, and lots of folks aren't aware of that. (As a side note, I thought I'd also be able to import it into Google Maps and see the image, but I wasn't able to. I'll let you know if I'm successful later.)

The only problem is that you need to know some html code to make it work. And, you need to know something about path structures. Neither of those concepts is difficult (the techie guy says) but it's something that must be taught to most folks.

On a Windows machine finding the path is very easy. Right-click an image and choose properties and you'll see the path listed in the Location field. All you have to do is add the file name to the end of it. For example, it might read something like, C:\Documents and Settings\Jim Gates\My Documents\My Pictures\favorite cabin pics\. If the picture itself is called: mypic.jpg then the complete path is: C:\Documents and Settings\Jim Gates\My Documents\My Pictures\favorite cabin pics\mypic.jpg.

The next issue is how to write the code so that the picture shows up when you open the placemark. You use the img tag. It would end up looking like this: There, now I REALY think that those two ideas could be taught to a relatively comfortable computer user with little trouble, Would you agree? First, how to find the path. Second, how to write the syntax for the img tag to get it to display.

I should mention here that if the image was online somewhere this whole thing would have been easier, still. The tag would be something like: (fake address) If you can see the picture in its own window in the browser, just copy the url inside those quotes and you're done. But, I wanted an image from my hard drive.

The problem that I was having is that I'm on a Mac and the path isn't as easy to find. And, when you do find it you can't copy it, unlike in Windows where you CAN copy it. (Come on, Apple, what's with that?) That just means that you have to type it, but when you start to type you start to have opportunities for typos.

Well, I tried everything I would think of. When I couldn't solve it, i turned to my twitter friends. I asked if anyone knew how to write the path. Eventually, @tiutmcclain gave the suggestion of using the file:// format that you see when you open an image, for example, in your browser. The url reads: file://c:\Documents and Settings\..." etc etc. So, I tried it, but it still wasn't working. But, I KNEW this would be the answer, eventually. I then searched online for a forum in which someone had asked how to write a path on the mac, and sure enough, once I saw that it worked like a charm.

So, for you mac users out there, if you want to put a picture (on your desktop) in a Google Earth placemark, the syntax is:

  • Just replace the jamesgates with YOUR username that you'll find inside the Users folder.
  • Oh, and make sure there are THREE forward slashes after the colon after file.
  • And, the mac path uses forward slashes; windows uses BACKslashes. Did you notice that?
And remember, when you save the placemark you also are saving the image so you can send it to others who can then open the placemark in Google Earth and see your image.
---
Follow up
Thanks to Jim Beeler from Apple who gave me this GREAT suggestion. Drag the picture from its folder and drop it onto your browser icon in the dock. When the browser opens the url will show the file path. Example: file:///Users/jamesgates/Desktop/s4_2.jpg Just copy and paste that into the tag and it should work. GREAT solution, Jim!

Tes Kesamaptaan PLN Bali 2009 in Action

Seperti dugaan saya, tes Tes Kesamaptaan PLN Bali 2009 akan berat bagi tipe orang yang jarang olahraga seperti saya. Sekarang saya akan berbagi mengenai apa yang saya alami di tes itu (gaya kata-katanya seolah menyeramkan saja...). Pertama yang datang dan menjadi konsultan untuk tes ini adalah bapak dari POLDA Bali.

Test Pertama adalah Lari dalam waktu 12 menit mengelilingi Lapangan sepak bola dalam GOR Ngurah Rai yang satu kelilingnya 440 m. Waktu menunggu giliran lari ini cukup lama. Seluruh peserta yang terdiri 247 orang dibagi sekitar 40 orang setiap group. Saya ada di group 4, jadinya lama menunggu dan larinya saat matahari sudah terik. Saya cuma bisa 5 putaran. itu juga teler!!!

Sehabis lari, kemudian Pull Up (restok orang belanda bilang). Pull Up juga cm bisa 5 kali. Ada yg bisa sampai 18 kali lho..dia sih katanya Fitness.

Habis restok ada Sit Up (Bangun Lagi, Tidur Lagi, kayak lagunya Mbah Surip). Selama 1 menit saya bisa 33 kali. Gaya sit Up juga harus benar, jika salah tidak dihitung. Lanjut ke Push Up, lagi-lagi sama jika salah tidak dihitung. 1 Menit Push Up saya bisa 30 kali. itu juga pake berhenti-berhenti segala.

Habis Push Up ada test Ketinggian, namun peserta yang ikut test ini adalah yang melamar Junior Engineer dan Junior Officer. Sayangnya saya harus mengikuti tes ini karena ada di Junior Engineer. Apa boleh buat Panjat saja tangga setinggi 15 - 20 meter itu. Selesai.

Setelah ada tes kesamaptaan, Esok hari ada tes kesehatan. Kita ditelanjangi disana..Uh..Jadi takut dan malu ni..!!! Besok, 27 Juli adalah tesnya. Semoga terlewati dengan baik.

Saturday, July 25, 2009

Post weekly (weekly)


Posted from Diigo. The rest of my favorite links are here.

Fifth Year Anniversary of Blogging

It is hard to believe that this is my Fifth year anniversary of the AssistiveTek Blog which started back in July 2004. Little did I know that this experiment would survive all of these years, and as I close in on my 500th blog post some time this summer I can say thank-you, to all the readers out there that keep me going. It has been a very exciting trip being able to share information and my ideas about mind mapping, assistive technology, project management and Web 2.0 technologies. Along the way I have met some incredible people who have the same passion for the technologies that I speak about. And while others may speak about social networking in the abstract, I would have to say that because of my blog I have enriched my life by meeting so many wonderful people that I keep in touch with on a weekly basis. So as I reflect on the Fifth Anniversary of the AssistiveTek Blog it has been a great road trip and one that I'm sure will continue for another million miles or so. If you have a chance I would enjoy your comments as I celebrate the 5th Anniversary of this blog.

Tes Kesamaptaan PLN Bali 2009

Besok, Minggu 26 Juli 2009, Saya akan mengikuti Tes Kesamaptaan untuk Seleksi awal PLN Bali. Sekedar Uji Keberuntungan aja. Jadi tidak yakin nie teman-teman...!! Masak sih orang kayak Saya yang ga pernah olahraga akan mampu mengatasi Tes ini dengan baik. Saya jd minder dan tidak bersemangat untuk test ini.

Sebelum tes isi acara blogwalking dulu. Sekarang uda hampir jam setengah 12 dan besok harus bangun jam 5 pagi, karena test nya akan berlangsung mulai jam 6 pagi di Stadion Ngurah Rai Bali. Persetan aja..Saya lebih hobi blogwalking daripada lari lari dan test fisik..

Seperti biasa terdengar isu akan lari keliling GOR dalam waktu 12 Menit. Katanya harus mampu 6 putaran. Mati dah Saya..!! Habis itu push-up, Sit-up, Lari delapan..Lupa apa sisanya.. karena cuma dengar-dengar aja sebelumnya.

Apa mau dikata besok pengalaman test kesamaptaan itu pasti bakal Saya sharing ke teman-teman blogger mania. Siapa tau aja teman-teman butuh informasi sebelum menjalani test kesamaptaan nanti.

kali ini Saya Minta Dukungan untuk Test Kesamaptaan ini.
Terima Kasih Rekan-Rekan Semua.

Oka antara penyanyi Rap / RnB..?? Baru Tau

Oka Antara dikenal sebagai seorang bintang akting film layar lebar Indonesia. Ia pernah membintangi film seperti GUE KAPOK JATUH CINTA (2005) dan film horror arahan sutradara Adrianto Sinaga, HANTU (2007) dan terakhir berperan dalam Sinetron Manohara RCTI.

Pria yang kini menjalin hubungan dengan aktris Rara Wiritanaya itu semakin terkenal saat memerankan karakter Syaiful dalam film sukses AYAT-AYAT CINTA arahan Hanung Bramantyo. Oka sendiri sebelumnya pernah disiapkan memerankan tokoh Facry sebelum kemudian diberikan Fedi Nuril.

Oka dan Rara akhirnya meresmikan hubungan mereka dalam upacara pernikahan di kampung halaman Oka, Karangasem Bali pada 07 Juli 2008. Sedangkan resepsi pernikahan digelar di Jakarta pada 11 Juli 2008.

Kemampuan akting Oka tetap diasah sembari menunggu jabang bayi, hasil buah cintanya dengan Rara yang sedang hamil tua. Oka turut bermain di film besutan sutradara Hanung Bramantyo, PEREMPUAN BERKALUNG SORBAN.

Setelah kerap berperan di film religi, kali ini Oka mencoba peran yang berbeda di film terbarunya, QUEEN BEE. Di sini ia mesti berperan sebagai seorang secret service agent, seorang pengawal presiden.

Oka juga adalah Rapper Berbakat, bahkan sebagian besar dari kita belum tau dia adalah penyanyi Rap / RnB.

Siapa sangka dia punya Video Clip Bagus, dan saya baru mengetahui hal ini dari teman di Amerika. Teman saya di Amerika sana tau duluan dari saya dan katanya dia sudah punya banyak video clip. Salah satunya video clip berikut :

Oka Antara - So Special (Feat Sabria)


Oka Antara - You Make Me Cry


Sabria di Video Clip So Special itu Sabria Kono, Kekasih Rio Febrian.
Sebagian Sumber : http://selebriti.kapanlagi.com/oka_antara/

Friday, July 24, 2009

How to Get our Laptop Make Adress / Phisycal Adress

Laptop Make Adress is unique Serial Number Provide by Laptop Fabric to identify every Laptop. Usually Make Adress is use in enrollment of Wireless Fidelity access to the Laptop.

Be Sure you note the Make Adress to easy the enrollment steps. You will no need to activate your Laptop when Administrator ask the Make Adress.

How we know the Laptop Make Adress Serial Number..?
1. Click Start-->Run
2. Type cmd
Windows Run
3. Type ipconfig /all
Laptop Make Adress Phisycal Address

Disable autoplay in Windows XP using Registry Editor

Whenever We attach my Flashdisk, External Hard disk or CD, Windows scans the entire contents (which can take quite awhile on a large disk) and brings up a list of suggested actions.

Even when We select 'Take no action' and check the 'Do this in the future' box, autoplay is executed the next time I insert my media or device.

This also bring harm effect to our computer. Virus can be attack our Computer by let the autoplay Configuration On.

If we disable our Autoplay, our computer will probably safer from viruses.
The autorun file in the plug and play drive (Autorun.inf or autorun.ini) can't be work if we turn off autoplay in all drives. So The Virus that usually came with autorun can't directy infected our computer.

We can disable autoplay in 2 manners,
1. Configure gpedit.msc
2. Configure Registry as brief explained here

How to Configure Registry Editor to disable autoplay in Windows XP is brief explained below :

1. Click Start --> Run
2. Type regedit in Run Windows

Windows Run
3. Browse For HKEY_CURRENT_USER\SOFTWARE\Microsoft\Windows\CurrentVersion\Policies\Explorer

Disable Autorun Registry Editor
4. Set NoDriveTypeAutoRun Value to ff

NoDriveTypeAutoRun Disable Autorun Registry Editor
5. Reboot Our Computer.
6. Finish, Your Computer Autoplay Configuration is become off.


How to put Michael Jackson Song MP3 in Your Blog

By. Agus47 - jatiblogger

Currently, Computer and Technology will discuss about How to put MP3 in Your Blog. For Michael Jackson fans who have blogs definitely eager to hear Michael Jackson music sung in his blog. However, some mp3 are usually only able to load only one song to install on a blog. Even if there are many who can load a song, is usually mixed with other songs. Nah, to solve this problem you may be able to use the solution that I just post here.

You can use www.hypster.com, to resolve the trouble. How? Very easy and free, you only need to follow the following steps:

Step 1:
  1. Open www.hypster.com.
  2. Clicks sing up.
  3. In the column that has been provided fill in your data, your email, username, and password.
  4. Check the field (I have read and accepted the Terms of Service).
  5. Click continues.


Step2:
  1. Fill in the column that has been provided with your Name, Country, City, Birthdates, about me, and you can upload your picture on the Profile Photo.
  2. Click save change.
  3. Or if you want to fill it later, you can click Skip This Site.


Step3:
  1. Now, you already on the area My Account.
  2. You can use the mp3 with use search music to find the music you like.
  3. After finding the music you are looking for, you can try it by clicking the arrow buttons (preview) to know the music sound quality.
  4. When you have match Click +, to sign move the music to your account page.
  5. You can see in the playlist, the music that you have moved earlier.


    When in search music, you can not find the music you are looking for, you can upload music from files on your computer to your playlist with click upload music. After the music you need have your input in my playlist, you can install on your blog. How? Follow these steps:
    1. In my account bottom there is a banner icon embed get code, click the banner.
    2. In the area Install player, you can set the Enable Autoplay  (checkbox if you want autoplay mp3 or empty if you want to play man), Enable Shuffle Mode (checkbox if you want to Shuffle Mode mp3 or empty if you do not want to Shuffle mode), and Player Color Scheme (you can change your mp3 color according to the condition of your blog).
    3. After that you can copy the code in the Embed Code.
    4. Then login in blogger.com (for the blogspot user).
    5. In Dashboard select Layout.
    6. Click page element.
    7. Click add gadget.
    8. Click html / java script.
    9. Paste code from the embed code to the html / java script.
    10. Then click save.
    11. See the results on your blog. 


    Now you can hear the Michael Jackson music in your blog.

    Happy to try….

    Brain Technologies Unveils WebBrain Beta

    One of my favorite features of the PersonalBrain 5 is the ability to create a SiteBrain from your PersonalBrain. I have used this feature many times in my workshops as a way to give my participants and easy way to move about various resources that I would provide. In the past you would need to Export your Brain as a SiteBrain and then upload it to your ftp site. Now with the release of the WebBrain Beta you can quickly upload your BrainZips and share your Brains with others. Once you sign up for a free account you can upload your BrainZip files and determine whether you want to make your Brain-Public or Private. You can also set the permission to share your Brain by sending a link via an email. I have posted one of my Brain files to show you how it looks on the web. The ability to share your Brain's on the web is a killer feature and one that I will begin to use more and more. You will find find this feature to be invaluable whenever your want to have access to your Brain data when you are connected to the web. So if you are a PersonalBrain 5, please take a look at the WebBrain- you will be glad you did.

    Download a Free Trial Version of PersonalBrain 5 by Clicking on the Link Below
    Windows
    Macintosh

    To purchase a copy of the PersonalBrain 5 click here. If you need training or support on how to best use the PersonalBrain send me an email

    Thursday, July 23, 2009

    Context Organizer for MindManager Webinar

    Yesterday I had a chance to participate and present information about Context Organizer, in a virtual MindManager User Group Meeting at a Fortune 100 company. After presenting and being a participant in various webinars, I am still amazed at what can be accomplished without the need to be in a face to face meeting. The hour long meeting went very smoothly and when it was my turn to present I shared my computer desktop with the group and showed them how Context Organizer, a MindManager add-in can be used to summarize Word documents, web addresses, and PDF files right within a MindManager map.

    I have posted about Context Organizer before and I have a couple of video demonstrations to show you the power of this tool. The MindManager User Group had selected to see a demonstration of Context Organizer in action because one of the member's of the group had been using it to plow through large documents with great success. You can think of Context Organizer as a "search engine for documents," in that it finds the most relevant keyphrases and information and succinctly summarizes it for you. If your work requires you to read through large documents or to do analyze web sites, PDF's or Word documents you really owe it to yourself to look at Context Organizer. Having the ability to access Context Organizer within MindManager is a real asset in how the information is graphically organized. For those of you who don't own a copy of MindManager 8 you will be happy to learn that Context Organizer is also a standalone product that can help you summarize documents and send the information directly to Microsoft Word.

    As a postscript to this webinar, I should share with you that I used my recently purchased Acer Aspire Netbook to present from. You see when I went to use my Dell XPS laptop the virtual meeting platform did not support Internet Explorer 8, so my only option was to use my netbook. I am happy to report that my netbook worked just fine even with all of the heavy lifting. To complement my presentation, I also used Canson's Papershow product which is an ideal tool to use when you are doing a webinar. With Papershow I could share my ideas and write them down so that other could see them as if I was writing on a whiteboard. Everything I wrote down was shared and at the end of the webinar I could save it as a PDF file to email. Here is an example of what I wrote and shared with the group using Papershow. Papershow is a real natural-when doing virtual presentations or distance learning and is as easy to use as pen and paper.

    Please feel free to leave me a question about mindmapping

    Wednesday, July 22, 2009

    The Pirate Bay: Users can delete accounts ahead of sale

    IDG News Service - The operators of The Pirate Bay will allow users to delete their accounts on the torrent-tracking site, a feature many users have requested since a deal to sell the site was announced Tuesday.
    Swedish Internet cafe operator Global Gaming Factory X (GGF) announced on Tuesday that it plans to buy The Pirate Bay for $7.8 million, prompting negative reactions from many of the site's users.
    "Many people have asked about having their account removed, and we will not force anyone to stay on," The Pirate Bay's operators wrote in a posting to the site's blog on Tuesday.
    The operators planned to build a user deletion interface later Tuesday, according to the posting.
    Users should not worry about their personal data falling into the wrong hands, they said.
    "We have no logs of anything, no personal data will be transferred in the eventual sale (since no personal data is kept). So no need to be worried for safety," they wrote.
    While the question of logs is important in some European countries, Sweden has yet to adopt into national law a European directive requiring telecommunications and Internet companies to retain data about their customers' online activities for law enforcement purposes.
    Comments on the deal were not confined to requests for the account deletion feature. Other users called the site operators sellouts and said the deal will kill The Pirate Bay.
    The operators wrote, however, that The Pirate Bay couldn't afford to develop its services further without outside help.
    "We cannot finance the growth of the site anymore," they wrote, adding that the deal with GGF was the only available option.
    Many users are still upset over that deal, but there also more understanding comments to the blog posting. "You will always have my support!" a user identified as blake324 wrote. And someone known as MassExodus said, "Thank you The Pirate Bay for all you've provided over the years -- we'll see how it pans out over the next few months."

    USB Flash Transformer model

    By. Agus47-jatiblogger

    Currently, Computer and Technology will discuss about unique gadget. As you know that the USB flash is a very useful gadget for storing important data as an alternative from floppy disks and CD's. But of course you know, like where the form of a standard USB Flash right? Well sometimes you can be bored with the simple shapes that. But this time have many different forms of the USB Flash you can eliminate boredom, for example, this USB Flash with model transformer.


    I am very very interested with the model, and many other interesting model for this type of USB Flash here. (15 Unique and Creative USB Flash Driver).

    And you can also see a Controller NES can be used as a unique variety of gadgets like (NES Controller ipod Shuffle Mod).


    Interesting right? you can visit to see the various unique gadgets in the site: www.toxel.com


    Happy adventure a the unique world....

    Knowing Blog Dofollow with NoDoFollow 1.1

    By. Agus47-jatiblogger

    Currently, Computer and Technology will discuss about Knowing Blog Dofollow with NoDoFollow 1.1.
    After you change your blog for Nofollow become Dofollow, you will surely find another blog to share the backlink. But, to know a blog is Dofollow or not, sometimes we have to find out first with a view page source on the blog, or looking for a blog who use Dofollow banner.
    For mozilla firefox users, there is easier way to install the tools called NoDoFollow 1.1, which we will make it easier to know a blog dofollow or not.

    How do I install NoDoFollow 1.1? Follow the steps below:
    1. Open your mozilla browser.
    2. Click Tools.
    3. Click Add-ons.
    4. Click Get Add-ons, and write in the search field with the “NoDoFollow 1.1”, then Enter / click the magnifier image.
    5. After NoDoFollow 1.1 is found, click Add to firefox.  
    6. After the countdown finished, click Install now.
    7. Click Restart firefox.
    8. Now you close the window Add-ons, and start using this toll.
    How do I use the tools NoDoFollow 1.1? Very easy, follow these steps:
    1. Right click on your mouse.
    2. Then click NoDoFollow to activate it. (Then all you have any posts Dofollow links will change the color to be blue and the Nofollow links will change in red).
    3. Click again NoDoFollow to none activate this tool.

    Or you can download here ( NoDoFollow 1.1 ).

    Easy is not it? Happy to try....

    Interview with Mike Taylor Developer of StrengthsMapper for MindManager

    Last week I had the opportunity to interview Mike Taylor the developer of the recently released MindManager 8 add-in called StrengthsMapper. Mike was kind enough to invite me into the beta testing of StrengthsMapper so that I could get a chance to use it before it was released. I also had the opportunity to read StrengthsFinder 2.0 by Tom Rath and Strengths Based Leadership by Tom Rath and Barry Conchie which is the foundation for understanding how StrengthMapper can be used on a personal level and with a team in a business environment. Essential to understanding how StrengthsMapper can be used is the notion that as an individual we all possess strengths which when identified can be used to propel us forward in our personal and professional lives. As a psychologist, I can certainly relate to these premises and in my own work with children and adults know how important it is to help focus on an individual's strength as a means to work through their difficulties.

    In 2001, Gallup introduced an online assessment, StrengthFinder which helped individuals identify their Top 5 talents among 34 different themes. You can find out more information about the online assessment which has been updated to StrengthsFinder 2, and take the assessment online for a nominal fee. Once you have identified your Top 5 themes you can now begin to put together an Action Plan around them. During the interview, Mike Taylor explained to me that as an engineer and business consulting he learned early on that he could make more headway with his clients when he focused on their individual strengths. Managing talent by helping others focus on their top 5 themes and then developing an Action Plan was a very powerful tool and one that Mike wanted to share with others. Being an avid MindManager 8 user, Mike thought that if he could marry the power of MindManager 8 and present a graphic depiction of an individual's 5 Top themes that he could have a very powerful personal development tool. With this, Mike set out to do just that and developed the MindManager 8 add-in called StrengthsMapper.

    Once you take the StrengthsFinder 2 online assessment, you can quickly key in the information into StrengthsMapper and have a visual depicition of your Top 5 themes. You can see my 5 Top themes in the map to the Left. The power of this tool is not only on being able to visually stay focused on your strengths but by being able to build an Action Plan for the week, month and year ahead. StrengthsMapper is an easy and powerful tool to help you tune into your strengths and to build upon them via the Action Plans you create. Two version of StrengthsMapper are available, one for personal use called StrengthsMapper, and StrengthsMapper Pro which was developed for building effective teams by helping organizations to match talents and skills that are needed for a project. For more information you can go to StregthMapper.com

    To listen to the audio interview click here or hover over the speaker icon: Interview with Mike Taylor

    Tuesday, July 21, 2009

    From Nofollow Become Dofollow For Blogger

    By. Agus47-jatiblogger

    Currently, Computer and Technology will discuss about From Nofollow Become Dofollow For Blogger.
    Because this is the connection from the post earlier, From Nofolow Become Dofollow which explains how change From Nofollow Become Dofollow for worldpress template. So this time I will explain how to change From Nofollow Become Dofollow for Blogger/Blogspot template.

    Simply follow these steps:

    Step 1:
    1. Login in Blogger account.
    2. In Dashboard, chose Layout.
    3. Then click Edit HTML.
    4. For safety, make backup Template with Download full template.
    5. Give Check in Expand Widget Templates.

    Step 2:
    Find this code:

    <a expr:href='data:comment.authorUrl'rel='nofollow'><data:comment.author/></a>

    Step 3:
    Remove this code:

    rel='nofollow'

    Step 4:
    Save template. Then see the result.

    Now your blog has become Dofollow.

    Hopefully useful and successful for you all.

    Vampire Love Story with Human

    Some great film or cinemas about Vampire Love Story with Human are Twilight and Underword. Some others are Van Helsing. The Film about Vampire has great story, handsome actor, beauiful actress.


    Twilight

    Vampire, Dracula, Twilight, Bloodsucker
    Vampire, Dracula, Twilight, Bloodsucker
    Vampire, Dracula, Twilight, Bloodsucker
    Vampire, Dracula, Twilight, Bloodsucker
    Vampire, Dracula, Twilight, Bloodsucker
    Underworld
    Vampire, Dracula, Underworld, Lycan, Werewolf, Marcus, Bloodsucker, Sonja, Lucian, Victor
    Vampire, Dracula, Underworld, Lycan, Werewolf, Marcus, Bloodsucker, Sonja, Lucian, Victor

    Vampire, Dracula, Underworld, Lycan, Werewolf, Marcus, Bloodsucker, Sonja, Lucian, Victor

    Monday, July 20, 2009

    Music Soul, Music Feel and Music Vibration

    Sometimes when we hear our favorite song, a great stimulation come from the music or vocal. This stimulation sometimes calls feels. This stimulation can make a vibration in our body and soul. In some part of song's sometimes we feel more vibration, like the ending or climax.

    When we mixed up with a group of music / music team, we must feel the music, enjoy it more than spectator do. Play the music with heart and happy feeling, without be force to play. When I was in Marching Band, I play a trumpet, high brass horn line. It was a difficult section because the tone was very high and need a long time to be in common. I asked to be a Trumpet 1 Player. [High Brass / Trumpet Section play the high tone in Marching Band . There are three level in high brass section in The Team, Trumpet 1 play highest tone, Trumpet 2 play high tone and Trumpet 3 play middle high tone.]

    In the first time I cannot feel the music because I can't play the Instrument, but after about 4 months training, I can play the music, but sometimes loose some part, because it needs more time to be a Trumpet 1 Player. At the beginning training time I can't feel the Music Soul, Music Feel and Music Vibration. The Music Soul, Music Feel and Music Vibration were asked to be in each teams player in everyday training. If every player have the Music Soul, Music Feel and Music Vibration, the team can play the music with feeling and heart. The music have different soul, better effect and more life.

    The experience about music feel makes me give a better appreciation about music. I wonder how the composer can make the great music, how vocalist can reach a excellent tone and unique vocal.

    I like the music from Avenged Sevenfold, The Guitar is so great. I wonder how they can compose great music. I also like Vocal from Leona Lewis, Mariah Carey, Michael Jakson, and also Indonesian Artist, Gita Gutawa. They can reach very wide range of tone of course. I always feel a vibration in Leona Lewis vocal's in song climax of Bleeding Love.
    The tone was so high, beside the song is great.

    With feeling the music, the music will be different !!

    Sunday, July 19, 2009

    Page Template to give a variation in Wordpress Theme

    Below is a brief Article of Page Template to give a variation in Wordpress Theme.

    Variation wordpress page template is important thing we should do if we want different theme in a single wordpress site. This manner also important for reducing the needed of size by different wordpress theme (Usually we need 2 wordpress site if we want two different theme).

    This only can be done in downloadable wordpress (not in wordpress.com), because we need to add few extra file that can be a page template of Wordpress Theme.

    see the file structure below (usually in wordpress theme directory)

    page.php
    --> load header.php
    load #header {in style.css file}
    --> load sidebar.php
    --> load footer.php

    page1.php
    --> load header1.php
    load #header1 {in style.css file}
    --> load sidebar1.php
    --> load footer1.php
    page2.php
    --> load header2.php
    load #header2 {in style.css file}
    --> load sidebar2.php
    --> load footer2.php

    all the thing we should do are
    1. create page1.php and page2.php and more page template that we need.
    2. create definition that usually same as #header in style.css but load a different header image. example #header1

    this definition load another header image, so the appearance will be different from default appearance.

    3. Use this syntax usually before <?php get_header(); ?>

    <?php
    /*
    Template Name: Archives
    */
    ?>

    4. Choose a page template in creating new page. See The Example below..


    Figure 1. Choose a Default Page template
    Figure 1. Choose a Custom Page template.

    5. The Result


    Figure 3. Appearance with default Page Template

    Figure 4. Appearance with Custom Page Template.

    That's all, now you can have a variation appearance in one wordpress site. We can make many kind of page template, that can produce variation of appearance in our site.

    Saturday, July 18, 2009

    Post weekly (weekly)


    Posted from Diigo. The rest of my favorite links are here.

    Friday, July 17, 2009

    Turut Berduka Cita dengan Tragedi Pemboman JW Marriott & The Ritz Carlton

    Dengan ini saya menyampaikan duka cita atas Turut Berduka Cita dengan Tragedi Pemboman JW Marriott & The Ritz Carlton.

    Sangat disayangkan mengapa tragedi ini terjadi. Jika pelakunya orang Indonesia, mengapa tega, mengapa membom wilayah sendiri, diri sendiri. Yang sakit juga diri sendiri.

    Mengapa juga mau disuruh jadi pelaku bom bunuh diri. Menyia-nyiakan anugrah kehidupan yang diberikan Tuhan, disamping menimbulkan penderitaan bagi korban tidak bersalah.

    Apa motivasi dibalik Pemboman ini, entah Menggagalkan kedatangan Manchester United ke indonesia atau Penggagalan Pemilu..Akibat yang kita terima adalah Jelek.

    Detective Conan Award


    Peserta Pemberi Detective Conan Award:

    1. Friendster
    2. Google
    3. Surya Tips
    4. Antaresa Mayuda
    5. Rangga
    6. Ferdi Fauzan
    7. Yuliani 89
    8. Hafizu
    9. Rachmat
    10. Picas

    Tapi ingat, sebelum kamu meletakkan link diatas, kamu harus menghapus peserta nomor 1 dari daftar. Sehingga semua peserta naik 1 level. Yang tadi nomor 2 jadi nomor 1, nomor 3 jadi 2, dst. Kemudian masukkan link kamu sendiri di bagian paling bawah (nomor 10). Tapi ingat ya, kalian semua harus fair dalam menjalankannya. Jika tiap penerima award mampu memberikan award ini kepada 5 orang saja dan mereka semua mengerjakannya , maka jumlah backlink yang akan didapat adalah

    Ketika posisi kamu 10, jumlah backlink = 1
    Posisi 9, jml backlink = 5
    Posisi 8, jml backlink = 25
    Posisi 7, jml backlink = 125
    Posisi 6, jml backlink = 625
    Posisi 5, jml backlink = 3,125
    Posisi 4, jml backlink = 15,625
    Posisi 3, jml backlink = 78,125
    Posisi 2, jml backlink = 390,625
    Posisi 1, jml backlink = 1,953,125

    Dan semuanya menggunakan kata kunci yang kamu inginkan. Dari sisi SEO kamu sudah mendapatkan 1,953,125 backlink dan efek sampingnya jika pengunjung web para downline kamu mengklik link itu, kamu juga mendapatkan traffik tambahan.

    Nah, silahkan copy paste saja award ini, dan hilangkan peserta nomor 1 lalu tambahkan link blog/website kamu di posisi 10. Ingat, kamu harus mulai dari posisi 10 agar hasilnya maksimal. Karena jika kamu tiba2 di posisi 1, maka link kamu akan hilang begitu ada yang masuk ke posisi 10.

    Bagikan award ini sebanyak2nya, makin banyak sobat bagikan, makin banyak pula backlink yang didapat .
    batas kopi sampai disini .......
    selanjutnya tulis isi pesan versi sobat serta daftar penerima awardnya......

    Sederhananya Link yang sobat buat kiranya seperti berikut..

    1. Friendster
    2. Google
    3. Antaresa Mayuda
    4. Rangga
    5. Ferdi Fauzan
    6. Yuliani 89
    7. Hafizu
    8. Rachmat
    9. Picas

    10. url blog sobat

    Ini dia 10 yang mendapatkan award:


    Jangan sampai sobat ketinggalan untuk Award ini...

    Terimakasih buat sobat2 bloggers yang udah membaca artikel ini, ditunggu komentarnya :)

     
    Design by Free WordPress Themes | Bloggerized by Lasantha - Premium Blogger Themes | Sweet Tomatoes Printable Coupons