10:05 PM
 ari sari

Hello I hope your day is going fine, hope your in good health. Okay we will start on a blog series that will tackle on the computer hardware parts on the outside and on the inside. a lot of people who uses computer for almost everything don't have the time to know what's on the outside and what is on the inside of this very important machine.First of all i assume everyone knows what a computer look's like. Lately it has taken on a lot of very different shape and sizes and function but on this series of blog we will focus on the Desktop Computer, the first computer which was tailored made for offices, leisure spot, activity center and many more and of course your own home sweet home. Still remember your first computer, what was the specification of that? how big is the Monitor. What was the speed of the processor, how large was the hard drive and the memory. What was the color. How did you feel when your parents bought you your first computer. I'm sure you have a lot of memories regarding that time.
To start with the computer is made up several key component during it early years. They are the Monitor, Central Processing Unit, the keyboard, the mouse (pointing device) and also we have the printer. This was the basic parts ohhh I almost forgot, the speaker and microphone. The Monitor is your basic output devices, this is where we see what we are doing. The monitor is our windows to the uses and function of the computer. From CRT technology to thin LCD upto LED and HD technology monitor of today.The main basic difference of the monitor today than its ancestor is the size, another is the power consumption. Your old CRT monitor eats a lot of power when in use. But todays, LCD and LED screen eats smaller electricity even on if left open for a long time. Another big savings for the LCD/LED screen is the space the old CRT uses. Just imagine a 19" inch Desktop CRT of even bigger and compare it to the space needed for the LCD/LED screen.
 |
| Keyboard |
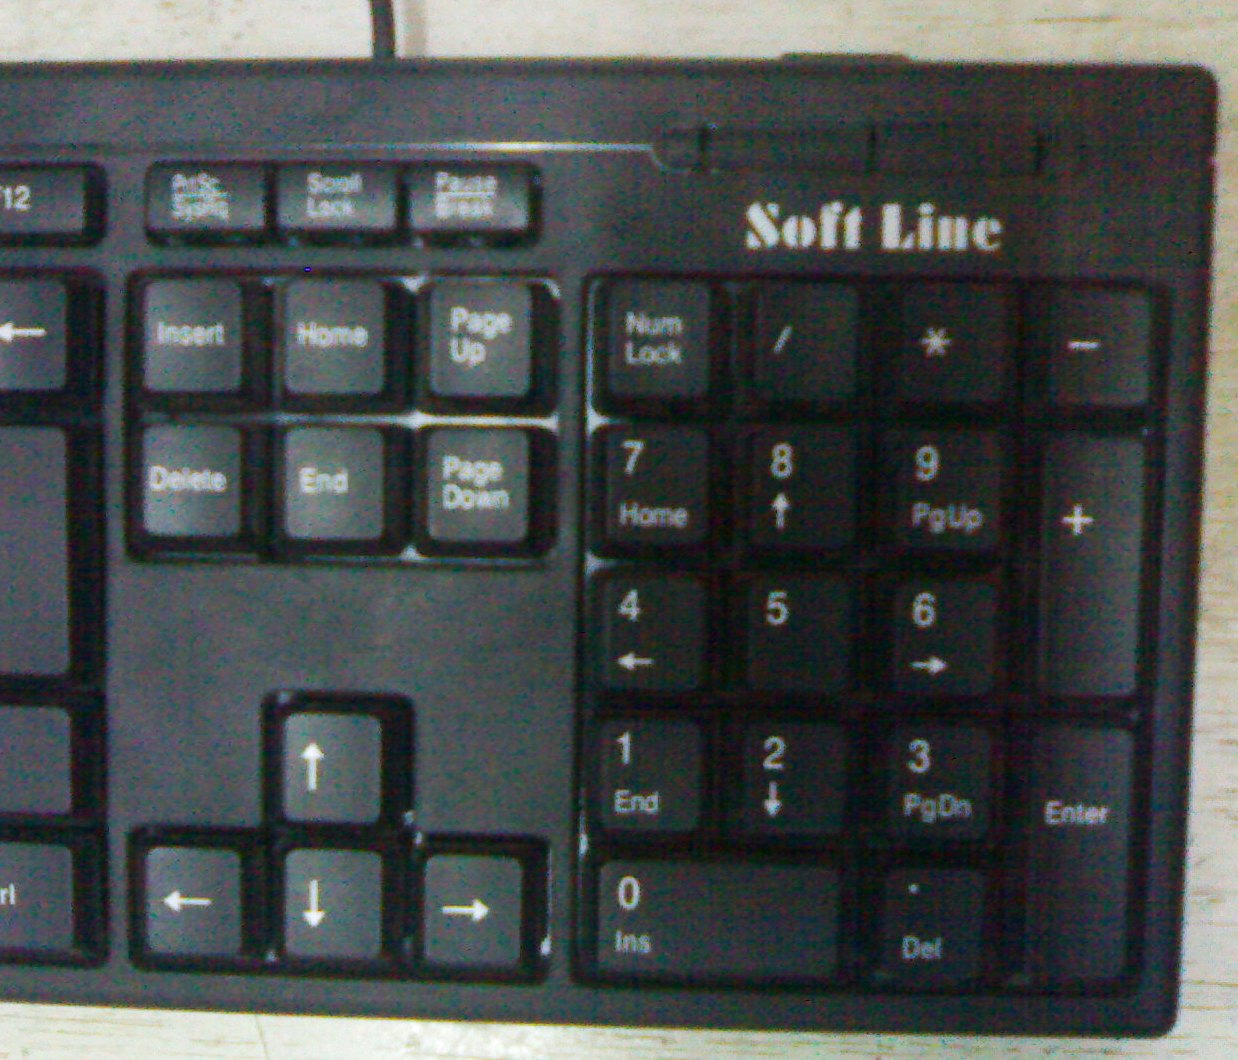 |
| Numeric Keypad |
Now let's go to the keyboard, there not much difference from the keyboard of the old days to the keyboard of today.It's basically the same design from the old model up to the new and latest model. There may be a few enhancement here and there, soft keys, hand rest to name a few enhancement. But still it is the same keyboard even if the wireless model and folding keyboard. The keyboard is the main input devices that is attached to the computer. It's like a type writer without the loud sounds. This is what we used to type documents and fill-out electronic forms online. This is also were we controlled our computer if it hangs, we pressed three keys to restart it. To access CMOS setup content and menu we press certain during the boot-up process. If your want to view process on your computer under windows we press certain key combination. For editing of document we also access the keyboard, especially for the people who uses the shortcut method of accessing all the function of the word processing software. The most ordinary keyboard will not function properly if water or liquid is poured into it. Buy some high-end type have built in protection for this kind of substance if accidentally spill into it.
 |
| Mouse with a lighted Scroll Wheel |
Next is the Mouse or you pointing device. Just like the keyboard the mouse has changed little ever since it was introduced in it's early days. From mouse with balls used for arrow movement to the infrared and scroll mouse of today. Basically it's the same design even the wireless one. There are also other type of pointing device used in computer, the track ball which has the ball on the upside not under. all mouse are still susceptible to the wear and there of the parts inside it just like the keyboard. If a key is used more often than the other chances are that key will be the first to be depressed.
 |
| Infrared Mouse tracker |
The nest item is the CPU or the Central Processing Unit, or the System Unit. It's be called by a lot of names. But we been referring to the same thing when it come to the computer. Well its better to talk about it on my next post. I'll be adding a couple of picture here as soon as i can.